


Detailed Guide to Deck Staining Process
Why Proper Deck Staining Makes or Breaks Your Outdoor Space
Deck staining is one of the most effective ways to protect your outdoor wood from moisture, UV damage, and everyday wear — while keeping it looking sharp year after year.
Here’s a quick overview of the process:
- Clean the deck — Remove dirt, mold, and old finish with a wood cleaner and brightener
- Let it dry — Allow 24–48 hours (or 2–3 days after pressure washing)
- Choose your stain — Pick oil-based or water-based, and select your transparency level
- Apply in the right conditions — Between 50°F and 90°F, no rain forecast, out of direct sunlight
- Apply evenly — Work 2–3 boards at a time, keep a wet edge, and back-brush as you go
- Let it cure — Stay off the deck for 24–48 hours after application
- Maintain it — Reapply every 2 years, or when water stops beading on the surface
Without proper staining, wood decks absorb moisture, crack, splinter, and fade fast — especially in Virginia’s humid summers and wet winters. A well-stained deck, on the other hand, can hold up through years of foot traffic, barbecues, and seasonal swings.
The key is getting the prep, product selection, and application right. Skip a step, and you risk peeling, blotchy coverage, or a finish that fails within a season.
As a Richmond-based exterior maintenance company with hands-on experience in professional deck staining and wood restoration, we know what it takes to deliver a lasting finish. In this guide, we’ll walk you through the complete process — the same approach our team uses for homeowners across the Richmond area.

Material Selection and Environmental Requirements
Selecting the Right Formula for Deck Staining
Choosing the correct product is the foundation of a successful wood restoration project. The debate between oil-based and water-based formulas is central to this selection.
Oil-based stains contain natural or synthetic oils that penetrate deeply into the wood fibers. This deep wood penetration provides exceptional nourishment to dry lumber, helping to prevent splitting and warping from the inside out. They are highly durable, wear down gradually over time rather than peeling, and are generally easier to recoat without extensive stripping. However, they typically feature higher Volatile Organic Compound (VOC) levels, require mineral spirits for cleanup, and have longer drying times.
Water-based stains (often acrylic-based) have advanced significantly. Modern water-based formulas dry rapidly, have very low VOC levels, and clean up easily with soap and water. They form a flexible, breathable film on the surface of the wood that offers outstanding UV protection and color retention. Because they dry quickly, some advanced water-based stains can even be applied to damp wood, allowing prep and application to occur on the same day under specific conditions.
| Feature | Oil-Based Stains | Water-Based Stains |
|---|---|---|
| Penetration | Deeply penetrates wood fibers | Primarily film-forming (some hybrid penetration) |
| Drying Time | 24 to 48 hours | 1 to 4 hours |
| Cleanup | Mineral spirits / paint thinner | Soap and water |
| UV Resistance | Good (gradual fading) | Excellent (longer color retention) |
| Wear Pattern | Wears away gradually | Can crack or peel if moisture gets trapped underneath |
| VOC Levels | Higher | Low / Eco-friendly |
Beyond the base chemistry, you must select the appropriate transparency level. This choice dictates both the aesthetic outcome and the level of protection:
- Transparent / Clear Sealers: These contain virtually no pigment, allowing the natural color, grain, and character of the wood to take center stage. While they provide excellent water repellency, they offer minimal protection against UV rays, meaning the wood will gray relatively quickly. Decks treated with clear sealers generally require maintenance coats annually.
- Semi-Transparent Stains: This is the industry standard for horizontal deck boards. They contain a subtle tint that highlights the natural wood grain while providing robust UV protection. They help blend newer boards with older, weathered lumber and typically last about 2 years on high-traffic horizontal surfaces.
- Semi-Solid Stains: Featuring a higher concentration of pigments, semi-solid formulas hide more wood imperfections and grain variations while still allowing the natural texture of the wood to show through. This is an excellent middle ground for older decks showing signs of wear.
- Solid Stains: Similar to paint, solid stains completely cover the wood grain with a rich, opaque color while leaving the physical texture visible. They provide the highest level of UV protection and can last up to 5 years on horizontal surfaces. However, because they form a thick film, they are highly vulnerable to cracking and peeling if moisture rises up through the wood from beneath the deck.
Optimal Weather and Temperature Windows
No matter how high the quality of the stain, applying it in poor environmental conditions will guarantee premature failure. The ideal air and wood surface temperature range for applying most deck stains is between 50°F and 90°F.
Applying stain in direct sunlight or on scorching hot boards is a critical mistake. High temperatures cause the solvents or water in the stain to evaporate too quickly. When this happens, the stain dries on the surface before it can properly penetrate the wood pores, leading to lap marks, an uneven finish, and rapid peeling. We always recommend working in the shade, early in the morning, or during the cooler parts of the day.
Moisture levels are equally critical. Before applying an oil-based stain, the wood must be completely dry. We recommend checking the local weather forecast to ensure there is no rain expected for at least 12 to 24 hours (ideally 48 hours) after application. If rain falls on wet stain, it can wash the product away, cause severe spotting, or ruin the curing process entirely.
Professional Deck Staining Preparation and Process
Preparing New, Weathered, or Previously Painted Wood
Proper surface preparation accounts for roughly 80% of the success of any deck staining project. The approach must be tailored to the current state of the wood.
New pressure-treated lumber cannot be stained immediately. The manufacturing process infuses chemical preservatives and high levels of moisture deep into the wood. Additionally, new lumber often suffers from “mill glaze” — a shiny surface layer created by the high-speed planing equipment at the mill, which closes the wood pores.
New pressure-treated decks must go through a weathering period of 3 to 6 months (and up to a year for dense, oily woods like cedar or redwood) to allow the moisture content to drop and the mill glaze to break down. Once the wood is dry enough to absorb water, it is ready for prep and stain.
For older, weathered decks or those with existing coatings, more aggressive preparation is required. If the deck has been previously painted or sealed with a solid product, the old finish must be completely removed. Applying a new semi-transparent stain over an old, failing coating will result in a patchy, peeling mess.
We use professional-grade chemical strippers to lift old latex or oil finishes. After stripping, we sand the surface. Sanding is essential to remove loose wood fibers, smooth out splinters, and open up the wood grain.
Our technicians start with a coarse 40-grit sandpaper to strip away stubborn remnants of old coatings, followed by an 80-grit sandpaper to leave the surface smooth and perfectly receptive to the stain. We always sand in the direction of the wood grain and take care to countersink any loose fasteners before beginning.
The Crucial Cleaning and Brightening Phase
Even a deck that has been sanded must undergo a thorough chemical cleaning and brightening process to ensure maximum stain adhesion. Sanding alone can push fine wood dust deep into the pores, blocking the stain from penetrating.
The cleaning phase utilizes specialized wood cleaners (often formulated with sodium hypochlorite or sodium metasilicate) to break down mold, mildew, organic stains, and deeply embedded dirt. To understand why this step is so vital, read The Dirty Truth About Cleaning Your Deck Before You Stain.
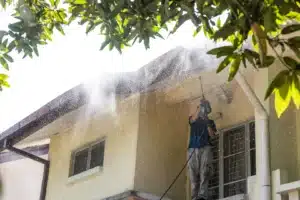
While homeowners often rely on heavy pressure to clean wood, improper use of a pressure washer can easily gouge lumber, fur up wood fibers, and ruin the deck. We combine professional Residential Pressure Washing techniques with low-pressure Residential Soft Washing to safely clean the wood without causing structural damage.
After cleaning, the wood must be neutralized. Wood cleaners are highly alkaline, which darkens the wood and leaves it in an unbalanced state. We apply an oxalic acid-based wood brightener to neutralize the pH, restore the wood’s natural, vibrant color, and open up the pores to accept the new stain. Once rinsed thoroughly, the deck must dry for a full 24 to 48 hours before the stain is applied.
Step-by-Step Application and Safety Protocols
Best Practices for Flawless Deck Staining Application
Applying deck stain requires a methodical approach to ensure even coverage and prevent unsightly lap marks. Lap marks occur when wet stain is applied over an area that has already begun to dry, resulting in darker, double-colored patches.
To avoid lap marks, our professional teams follow these strict application rules:
- Work Board-by-Board: Never apply stain across the entire width of the deck at once. Work on 2 to 3 boards at a time, moving continuously from one end of the board to the other.
- Maintain a Wet Edge: Always brush or roll wet stain back into wet stain. This ensures the product blends seamlessly without creating hard, dark lines.
- Back-Brushing is Mandatory: Even when we use high-speed sprayers or professional rollers to apply the stain quickly, a technician follows immediately behind with a high-quality nylon/polyester brush. Back-brushing pushes the stain deep into the wood pores, works out drips, and spreads out any puddles.
- Coat the End-Grain First: The cut ends of deck boards are highly porous and act like straws, drawing in moisture rapidly. We apply a generous coat of stain to all end-grains to seal them against water intrusion.
- Avoid Over-Application: When it comes to deck stain, more is not better. Wood can only absorb a finite amount of product. Any excess stain left pooling on the surface will dry into a sticky, shiny mess that will crack and peel within months. We always wipe away any unabsorbed stain before it dries.
Safety Protocols and Equipment Handling
Deck staining involves working with chemical cleaners, strippers, and solvent-based stains that require careful handling. Protecting our crew and your property is our top priority.
When sanding, technicians wear high-efficiency respirators to avoid inhaling fine wood dust, which can contain crystalline silica or toxic chemicals from older pressure-treated lumber. When applying solvent-based or oil-based stains, proper ventilation and organic vapor respirators are essential to protect against harmful fumes.
Additionally, oil-based stains carry a severe risk of spontaneous combustion. Rags soaked in oil-based stain generate heat as they dry. If they are piled up or thrown in the trash, they can easily catch fire. All oil-soaked rags must be submerged in water-filled metal containers immediately after use.
Our crews utilize a comprehensive list of essential safety gear on every project:
- N95 or organic vapor respirators (depending on the phase of the project)
- Safety glasses or face shields during chemical application
- Chemical-resistant gloves (nitrile or neoprene)
- Drop cloths and plastic sheeting to protect siding, landscaping, and electrical fixtures
- Wet-work boots with slip-resistant soles
Frequently Asked Questions
How long should you wait before staining a new pressure-treated deck?
You should typically wait 3 to 6 months before staining a new pressure-treated deck. The exact timing depends on weather conditions and how much direct sunlight the deck receives.
To determine if the wood is dry enough to accept a stain, perform the water drop test: sprinkle several drops of water onto the wood surface. If the water beads up and sits on top of the wood, the lumber is still too wet or mill glaze is still present; you must wait longer. If the water quickly soaks into the wood fibers, the deck is ready to be cleaned, brightened, and stained.
How do you know when it is time to reapply deck stain?
On average, a deck requires a maintenance coat of stain every 2 years for horizontal surfaces (like floorboards and stair treads) and every 3 to 5 years for vertical surfaces (like railings and posts).
The easiest way to check is with the water drop test. If water drops sink into the wood rather than beading up, the protective seal has worn away, and moisture is free to penetrate the wood. Furthermore, if you notice the wood starting to gray, fade, or show signs of mildew, it is time for a refresh. Keeping your deck clean and maintained prevents long-term damage. To learn more about local maintenance tips, see Don’t Let Your Deck Get Dirty in RVA.
What are the most common mistakes to avoid during application?
The most common mistakes in deck staining include:
- Over-application: Applying too much stain or a second coat when the wood is already saturated. This leaves a sticky, shiny film on the surface that will quickly crack and peel.
- Staining wet wood: Applying stain to wood that hasn’t dried for at least 24 to 48 hours after cleaning. Trapped moisture will force the stain off the wood as it tries to evaporate, causing rapid peeling.
- Working in direct sunlight: Staining hot boards causes the product to dry too quickly, preventing penetration and leaving unsightly lap marks.
- Skipping the brightener: Failing to use a wood brightener after cleaning leaves the wood pH too high, which prevents the stain from adhering correctly and results in a dark, muddy appearance.
Conclusion
Restoring and staining a deck is a highly technical process that requires precision, the right chemical solutions, and careful attention to environmental conditions. While it can be a tempting DIY project, achieving a flawless, long-lasting finish requires specialized equipment and professional expertise.
Our team serves homeowners throughout Central Virginia — including Richmond, Henrico, Chesterfield, Midlothian, Glen Allen, Short Pump, Mechanicsville, Ashland, Hanover, Powhatan, Goochland, Bon Air, Moseley, Tuckahoe, White Stone, and Manakin Sabot. Our trained technicians follow a rigorous, multi-step restoration process to ensure your wood is perfectly prepped, neutralized, and coated for maximum longevity.
Restore your deck with professional residential fence and deck staining to protect your outdoor investment and keep your home looking its absolute best. Reach out to our team today to discuss your next project!